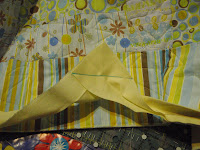
Today though I think I've had a break through on binding!
Although I usually cut straight strips I always join them on the bias. Before I went back to work, I went to some classes at the LQS and was taught how to finish the binding with a bias join. Unfortunately after a few nights sleep, all the instructions ran away from my memory.
A few weeks ago I went back for a course at the LQS and was taught again how to do the bias join. Well I have had a few sleeps since and I was finishing the boy's quilt (yes I know it's taken a long time) today and wanted to give it a go.
It worked! I am so excited about this because I have bought a binding tool and I couldn't get to grips with it and like the finish when you join the binding the same way all the way around. So I am committing the instructions to here so I can't say I have forgotten again.
- Leave about 6 inches free at each end and each end should over lap by the width of the binding and a bit more.
- Lay the binding out and crease each end so they join (butt them together)
- Cut one end to the crease
- With the bit cut off open it out, lay it on top and perpendicular to the other side (this give you the join point plus the width of the binding)
- Cut any excess off (cut is made on the further side from the crease)
- Putting right sides together, lay the shorter end perpendicular and on top of the other side.
- Draw a line across the square that is made.
- Stitch along that line.
 |
| Only took this one because I was so shocked it worked! |
- Check that when you refold the binding it lays flat and all folds the right way (this is important!)
- When you are happy, cut the excess triangle leaving a 1/4 inch seam, press
Hope you had a happy Wednesday!
